
Introduction to Perfect Nail Polish Application
Achieving the perfect nail polish application is akin to mastering an art form. It takes patience, precision, and a bit of know-how to transform bare nails into beautifully colored canvases without imperfections. Whether one is preparing for a special event or simply indulging in a routine beauty ritual, even application is key to a salon-quality look. Skilled application can prevent the dreaded smudging, chipping, and the uneven appearance that can detract from the most stunning of colors.
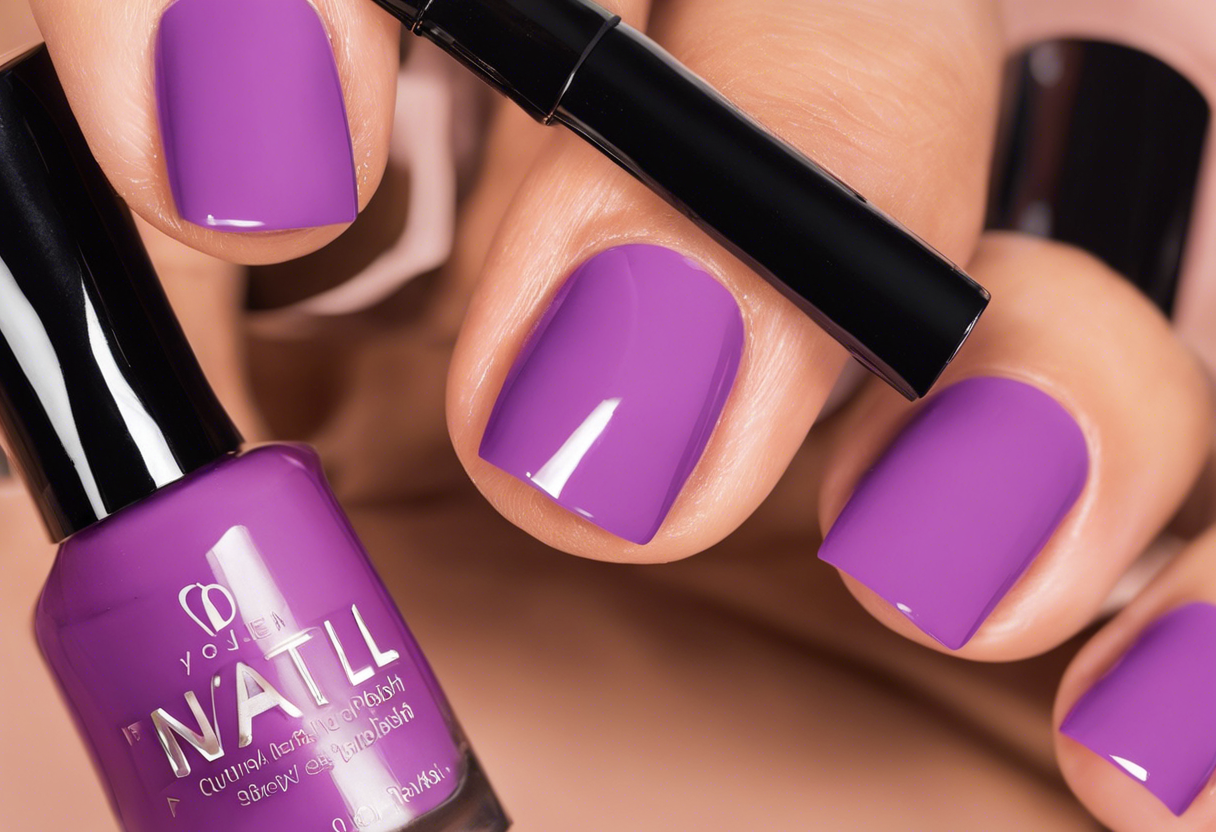
Before commencing the nail polish application process, it's imperative to gather all necessary tools and materials. A clean, flat surface with ample lighting sets the groundwork for a flawless finish. To get started, here are the basic supplies required:
- A high-quality nail polish
- Nail polish remover
- Cotton pads or balls
- A fine-grit nail file
- A nail buffer
- Cuticle pusher
- Base coat
- Top coat
- Clean-up brush or a small piece of sponge
Preparation is crucial for longevity and a smooth finish. One should begin by thoroughly cleaning the nails with polish remover to eliminate oils or residue that might affect adhesion. Once cleaned, shaping the nails with a file and gently buffing the surface can help the polish bond more evenly. Pushing back the cuticles ensures that the polish can be applied right up to the nail bed, creating a seamless line.
A technique often overlooked is the importance of thin, controlled layers. Starting with a base coat not only protects the natural nail from stains but also provides a tacky layer for the color to cling to. Applying the nail polish in thin layers, allowing each to dry before applying the next, reduces the risk of bubbles and helps avoid a gloopy texture. Once the color is satisfactorily opaque, a top coat seals in the color, adds shine, and extends the life of the manicure.
Keep in mind, practice makes perfect. Each stroke brings one closer to achieving a polish application that is nothing short of flawless.
Understanding Your Nails: The Canvas for Your Art
Before delving into the art of applying nail polish flawlessly, it is crucial to comprehend the structure of your nails. Nails are not just a platform for color but a reflection of personal health and hygiene. Here are several aspects of your nails to consider as you prepare for polish application:
Nail Anatomy: Familiarize yourself with the different parts: the cuticle, the nail bed, the nail plate, and the free edge. Most importantly, the nail plate is your primary canvas. It should be smooth and healthy to ensure an even polish application.
Nail Health: Healthy nails mean a better base for your polish. Nails that are brittle, discolored, or damaged can affect the final appearance of your manicure. Regular maintenance, such as moisturizing the cuticles and avoiding harsh chemicals, can vastly improve your nail health.
Nail Preparation: The condition of your nails pre-polish has a great impact on the outcome. Ensure your nails are clean, dry, and free of any oils or residue. Light buffing can even out any ridges or uneven surfaces. However, buff gently to avoid thinning the nail plate too much, which can lead to weakness.
Nail Shape: The shape and length of your nails can also influence how the polish appears. Determine a nail shape that complements your hands and lifestyle – be it rounded, square, almond, or any other form. Consistency in shape across all your nails presents a clean and professional appearance.
Base Coat Importance: An often-overlooked step is the application of a base coat. It's not simply an additional layer – the base coat acts as a primer that fills ridges, protects the nail, and provides a tacky surface for the polish to adhere to, which promotes longevity of your manicure.
In essence, the state of your nails is the foundation of a stellar manicure. Attention to health, preparation, and the proper introduction of a base coat are all essential processes to master before artsy creation begins. Understanding your nails and treating them with care will result in a smoother polish application and a more beautiful, lasting finish.
Choosing the Right Nail Polish: Brands, Formulas, and Shades
Selecting the ideal nail polish is more than just picking a color; it involves considering the brand, formula, and shade, all of which influence the final result. Here's a guide to making an informed choice:
Brands
When exploring brands, take into account their reputation, the range of colors available, and the brand's commitment to quality. High-quality brands like OPI, Essie, and Deborah Lippmann are renowned for their rich pigments and long-lasting formulas. If you're eco-conscious, consider brands such as Zoya or Butter London, which offer non-toxic and cruelty-free options.
Formulas
The formula of a nail polish affects its durability, finish, and drying time:
- Quick-dry polishes are perfect for those in a hurry, drying in a matter of minutes.
- Long-wear formulas promise a chip-free experience for several days and are perfect for extended wear.
- Gel polishes offer a high-gloss finish and durability, though they typically require a UV or LED light to cure.
- Nourishing formulas infused with vitamins or oils can help improve the health of your nails, a good option for individuals with brittle nails.
Always read the label to ensure the nail polish does not contain harmful chemicals like formaldehyde, toluene, or dibutyl phthalate (DBP).
Shades
The shade you choose should complement your skin tone and the occasion:
- Fair skin looks great with pastel and dark shades, which create a striking contrast.
- Medium skin is flattered by vibrant tones like pink, blue, or metallics that accentuate the warm undertones.
- Darker skin tones can carry off bolder colors with ease, from vivid oranges to deep berries.
For professional occasions, neutral shades like beige or soft pinks offer a polished look, while bolder hues are better suited for social events or expressing personal style. Remember, the shade should also match the season—light, breezy tones for spring and summer, richer, darker hues for fall and winter.
Choosing the right nail polish is an art form. By considering the brand, formula, and shade, you can ensure a flawless finish that lasts.
Tools of the Trade: Must-Have Equipment for a Smooth Application
For a flawless nail polish application, it is not just the technique that matters, but also the tools you use. Professionals know that the right equipment can make all the difference in achieving a salon-quality manicure at home. Here are the essential tools you'll need to ensure a smooth and even application:
High-Quality Nail Polish: This is non-negotiable. The best nail polishes have a balanced formula that is neither too thick nor too thin, making application effortless.
Base Coat: A good base coat smooths out any ridges and imperfections on the nail surface, giving you a flat canvas for nail polish.
Top Coat: A top coat seals in your color, preventing chips and giving your nails a glossy finish.
Nail File: A fine-grit nail file helps to shape your nails and remove any snags or rough edges before you start applying polish.
Orange Stick or Cuticle Pusher: Gently pushing back your cuticles with an orange stick or a cuticle pusher ensures the polish coats your nail completely and doesn’t cling to the skin.
Nail Polish Remover: To fix any mistakes, have a gentle, non-acetone nail polish remover at hand, preferably with a precision tip applicator.
Clean-Up Brush: A small brush dipped in nail polish remover helps tidy up the edges around your nails for a professional finish.
Nail Buffers: Buffing your nails lightly before polishing ensures a smooth application.
Lotion or Oil: Moisturizing your hands and cuticles prevents the polish from adhering to your skin and helps keep your manicure looking fresh.
Using these tools will set the stage for the perfect nail polish application. Remember, like any skilled craftsperson, a flawless finish begins with the quality of their tools.
Prepping Your Nails: A Step-by-Step Guide
Before you can begin applying nail polish, it's imperative to properly prepare your nails to ensure the best possible application and longevity of your nail polish. Follow these steps for flawless results:
Clean Your Nails: Start by removing any old polish with a gentle, acetone-free nail polish remover. This will leave a clean surface for your new polish to adhere to. Wash your hands with soap and water to remove any oily residue.
Shape Your Nails: Using a nail file, shape your nails to your desired length and style. Whether you prefer a rounded, square, or any other shape, make sure to file in one direction to prevent splitting.
Buff the Nail Surface: Gently buff the top of your nails with a nail buffer to create a smooth surface. Buffing helps to remove any ridges and imperfections which could cause your polish to apply unevenly.
Tend to Your Cuticles: Push back and trim your cuticles if necessary. Be gentle when pushing back cuticles to avoid damaging the nail bed. A cuticle softener can be used to ease this process.
Hydrate: Apply a nourishing cuticle oil to rehydrate your nails and cuticles, as the buffing and cleaning process can be drying.
Apply a Base Coat: Once your nails are clean, shaped, and moisturized, apply a clear base coat. The base coat helps to protect your nails from staining and provides an even surface for the colored polish to adhere to, improving longevity.
Let it Dry: Ensure that your base coat is completely dry before moving on to applying your color polish. This might take a few minutes but is a crucial step for avoiding smudges and chips.
Following these essential preparation steps not only contributes to a flawless nail polish application but also promotes the health and strength of your nails over time.
The Art of the Base Coat: Its Importance and Application Techniques
The base coat is the foundation of a perfect manicure, often likened to primer for paint. Its role is indispensable in achieving a long-lasting and lustrous finish. Serving as a protective layer, the base coat prevents staining of natural nails from pigments in colored polishes. Moreover, it smoothens nail ridges, ensures better adhesion of the nail polish, and enhances the color's vibrancy.
When applying a base coat, several techniques are essential to ensure its efficacy:
Clean Nails Thoroughly: Ensure that nails are clean, dry, and free of oils or lotions before application to allow the base coat to adhere properly.
Apply a Thin Layer: Use thin, even strokes to apply a single layer of base coat. A thin layer dries quickly and prevents bubbling, providing a smooth surface for the colored polish.
Cap the Free Edge: To prevent chipping, gently sweep the brush across the nail's free edge. This technique seals the base coat at the tip of the nail.
Avoid the Cuticles: Keep the base coat away from the cuticles and skin surrounding the nail. Any product on the skin can lift the polish from the nail, leading to premature peeling.
Wait for Adequate Drying Time: After applying the base coat, wait for it to dry completely before proceeding with the color polish. This typically takes about one to two minutes.
A practiced hand and attention to detail in applying the base coat can drastically improve the overall appearance and longevity of the manicure. By following these steps, the base coat becomes a vital ally in the quest for flawless nail polish application.
Mastering Nail Polish Application: Tips and Tricks for a Steady Hand
To achieve a flawless polish application, maintaining a steady hand is vital. Here are some tips and tricks to help refine your technique:
Choose a Comfortable Workspace: Begin by selecting a flat, stable surface. This will be your manicure station. An ergonomically supportive chair that aligns your back and allows your feet to rest flat on the floor will also help to reduce unnecessary movement.
Use Your Pinky Finger for Stability: When painting with your dominant hand, place your pinky on your non-dominant hand, or on the table, creating a stable anchor. This practice will significantly minimize the shaking of your painting hand.
Don’t Skip the Base Coat: Applying a base coat not only helps to protect the natural nail but can also create a smooth canvas. A steady application of the base coat assists in an even and steady application of the color coat.
Take Your Time: Rushing through the application will only increase the chances of mistakes. Allow each layer to dry before moving on to the next to ensure a smudge-free finish.
Hold the Brush Correctly: Gripping the brush handle with a thumb and two fingers—like holding a pencil—provides more control. Keep the brush near the cap end to counterbalance the bristles during application.
Practice Makes Perfect: Regular practice can significantly sharpen your nail polish application skills. Begin practicing with light colors that don’t show mistakes prominently until you gain more confidence.
Breathing Techniques: Before beginning, take deep breaths to calm any nerves and steady your pulse. Focused breathing can help to steady your hand throughout the process.
Incorporating these habits into your nail polish routine will certainly help in mastering a steadfast hand, ensuring a smoother, more professional looking manicure each time.
Working with Multiple Coats: Timing and Thickness
Achieving a flawless finish with nail polish not only depends on the initial application but also on how subsequent coats are added. The intricacies of timing and thickness play a crucial role in ensuring an even, long-lasting manicure.
Timing Between Coats
To avoid smudging and to allow for proper drying, one must be patient when applying multiple layers:
- First Coat: Apply a thin, even base coat and wait at least one to two minutes before applying the next layer. This base acts as a foundation for color adherence.
- Second Coat: After the base coat feels tacky to the touch but not completely dry, apply the first color coat. Thin layers are paramount to prevent bubbles and keep drying time to a minimum.
- Additional Coats: If the color is not opaque enough, a second color coat may be necessary. Wait another three to five minutes so that the previous coat can set adequately, reducing the risk of dragging the semi-dry polish.
Proper Thickness
The thickness of the polish dictates the final outcome, as too thick layers can lead to bubbling and take longer to dry:
- Consistency: Ensure that the nail polish is well mixed but not overly viscous. Roll the bottle between your hands instead of shaking it to prevent air bubbles.
- Application:
- Wipe excess polish off the brush on the inner rim of the bottle.
- Use just enough polish on the brush to cover the nail in three strokes – starting from the base of the nail and working to the tip.
- Top Coat: After the final color coat, wait seven to ten minutes before finishing with a top coat. This high-gloss barrier seals the color and adds additional protection.
By attentively observing these intervals and maintaining a consistent polish thickness, nails are less prone to chipping and the manicure has a greater chance of lasting beautifully for days to come.
Achieving the Perfect Finish: Top Coat and Drying Tips
To ensure a flawless nail polish application, the final steps play a critical role. Not only does a top coat enhance the beauty of your manicure, but it also protects the underlying color and extends the lifespan of your polish. Here are the key tips for applying top coat and ensuring optimal drying for that perfect finish:
Select the Right Top Coat: Choose a high-quality top coat that complements the type of polish used. Quick-dry formulas can speed up the process, while glossy top coats offer a vibrant shine. For those interested in nail health, consider using a top coat with added vitamins or nourishing components.
Apply Thin, Even Layers: Much like the base and color coats, the top coat should be applied in thin, even layers. A thick coat can take longer to dry and is more prone to smudging.
Wrap the Tips: To prevent chipping, don't forget to "wrap" the tips of your nails by dragging the top coat slightly over the edge.
Wait Between Coats: Allow the color coat to dry for a few minutes before applying the top coat. Rushing this step can lead to color streaks or smudges.
Dry Naturally if Possible: While quick-dry products can be tempting, allowing your nails to dry naturally can sometimes yield the best results. Avoid using heat or blowing on your nails, as this can cause bubbles or imperfections.
Use Drying Drops or Sprays: If you're short on time, consider applying drying drops or sprays that are specifically designed to speed up the drying process without compromising the quality of the polish.
Stay Cool: Keep your hands cool during the drying process. Warmth can extend drying time, so avoid washing hands with hot water or engaging in activities that raise your body temperature.
Following these top coat and drying tips, you should achieve a durable, glossy finish that not only looks professional but can withstand the rigors of daily activities.
Cleaning Up: Quick Fixes for Any Slip-ups
Despite careful preparation, a flawless polish application can sometimes be undone by minor imperfections. However, swift corrective measures can salvage a manicure. Here’s how individuals can address slip-ups efficiently:
Use a Clean-Up Brush: Dipped in nail polish remover, a small, angled brush can erase errors with precision. This tool allows for the removal of polish from the cuticles and skin surrounding the nails, ensuring a neat and professional appearance.
Correct Smudges: If smudges occur while the polish is still wet, individuals can gently smooth the area with a fingertip. Alternatively, once the polish has dried, applying a thin layer of top coat can sometimes help to even out the smudge.
Remove Excess Polish: For those hard-to-reach places like the edges and tips of the nails, a pointed cotton swab dipped in acetone can carefully clean away excess polish without disturbing the rest of the manicure.
Thin Out Bubbles: Tiny bubbles can form when polish is shaken too vigorously. To eliminate them, roll the polish bottle between hands before application instead of shaking it. If bubbles have already formed, piercing them with a pin and then sealing with a top coat can help rectify the situation.
Patch Up Chips: Should a chip appear shortly after application, filling in just the chipped area and reapplying the top coat can make the nail look immaculate once more.
In embracing these remedies, anyone can maintain the polished look of their manicure, ensuring that each nail radiates perfection even after encountering the occasional mishap.
Nail Care Post-Polish: Extending the Life of Your Manicure
Protecting a manicure and ensuring its longevity starts immediately after the polish application. Proper nail care can significantly extend the life of freshly painted nails, keeping them looking pristine for longer periods. Here are essential steps and tips one should follow:
Top Coat Application: A high-quality top coat acts as a protective shield for nail polish. For maximal efficiency, apply a top coat every two to three days. This not only adds a glossy finish but also prevents chipping and peeling.
Gloves Are a Manicurist's Friend: Whenever engaging in activities that could potentially damage a manicure, such as cleaning or dishwashing, it's prudent to wear gloves. This physical barrier will protect nails from harmful chemicals and physical abrasion.
Hydration is Key: Nails and cuticles are prone to drying out, especially when exposed to harsh environments. Keep them moisturized with a nourishing cuticle oil or hand cream applied daily to prevent brittleness and support nail flexibility.
Mind the Water Exposure: Prolonged submersion in water can weaken nail polish's adhesion to the nail bed. Limit long soaks in the tub and opt for shorter showers when possible.
Touch-up Tricks: Small chips can be remedied without a complete polish redo. Gently buff the area and apply a thin layer of polish followed by a top coat to merge with the rest of the nail.
Sun Protection: Just as sunlight can fade the color of fabric, it can also affect the vibrancy of nail polish. Utilize UV-protective products or limit direct sun exposure to retain the richness of the nail color.
By following these guidelines, one can not only preserve the aesthetic appeal of their manicure but also maintain the overall health of their nails. A well-maintained manicure is a testament to meticulous self-care and attention to detail.
Advanced Techniques: Creating Professional-Looking Nails at Home
Achieving salon-quality nails at home requires patience, practice, and the right techniques. Here are advanced tips to enhance the finish and longevity of your nail polish:
Prep with Precision: Take the time to clean, file, and buff your nails thoroughly. Use a cuticle remover to gently push back cuticle for a neat nail bed. Apply a base coat to protect your natural nails and to provide a smooth canvas for polish.
Layering Logic: Apply thin, even layers of nail polish, letting each layer dry before adding the next. This avoids bubbling or smudging, leading to a cleaner, more professional finish.
Tool Kit: Utilize a variety of brushes for different effects. A fine-tip brush is perfect for detailed art or cleaning up the edges, while a flat brush is ideal for applying color evenly.
Top Coat Tactics: Always seal your color with a top coat. A quick-dry formula can speed up the process, but for a truly long-lasting manicure, consider a gel-effect top coat applied with a UV or LED light.
Edging Excellence: After your final layer of top coat, use a clean brush dipped in nail polish remover to tidy any polish that might have strayed onto your skin.
Temperature Control: Avoid hot water for a couple of hours post-application as it can cause expansion and contraction, leading to chipping or peeling. Instead, run your nails under cold water to help set the polish.
Using these techniques can transform your at-home nail polish application into an expert routine. replicating the meticulous care you would receive at a professional salon.
Nail Health: Tips for Maintaining Healthy Nails Beneath the Polish
While expert polish application lends a splendid finish to the nails, maintaining the health of the natural nail beneath is crucial. A beautifully painted nail can be deceptive, concealing the true condition of an individual's nail health. To ensure nails remain strong and healthy, one must consider several factors.
Keep Nails Clean and Dry: To prevent bacteria and fungi from thriving, individuals should ensure their nails and the surrounding skin are clean and dry. Excess moisture can promote the growth of organisms that lead to infections.
Be Gentle: One's nails are not tools to pry things open. Using them in such a manner can lead to splits and breaks. Instead, it's recommended to treat nails with care and avoid any behavior that causes unnecessary stress or damage.
Trim Regularly: Regular trims contribute to sturdy nail growth. Cutting nails straight across and rounding the tips slightly is the preferred method, as uneven cuts can lead to ingrown nails.
Use Moisturizer: When applying hand lotion, individuals should pay attention to their nails and cuticles too. Moisturizers keep the nail bed and cuticles supple, reducing the risk of hangnails and cracks.
Limit Exposure to Chemicals: Harsh chemicals in cleaning agents can weaken nails. It is advisable to wear gloves while cleaning or when using any chemical-laden products.
Avoid Overuse of Nail Polish Remover: Overuse can strip the nails of natural oils. It's best to choose acetone-free removers and to limit their use.
Give Nails a Break: Periodically, individuals should take a break from polish to allow their nails to breathe and recover from any potential damage caused by prolonged polish wear or removal.
Monitor Nail Health: Changes in nail color or texture can point to various health concerns. Seeing a dermatologist upon noticing any unusual changes is recommended.
By following these tips, individuals can ensure they have healthy nails, creating the perfect canvas for a flawless nail polish application.
The Big No-Nos: Common Nail Polish Mistakes and How to Avoid Them
Nail polish application seems straightforward, but a flawless finish requires avoiding common pitfalls. A keen awareness of these 'big no-nos' can transform a manicure from mediocre to magnificent.
Skipping Base Coat: One might be tempted to bypass the base coat for time's sake, but this is a grave error. A base coat is essential for protecting the nail from staining and providing a smooth surface for color application. To avoid this, always start with a clear base coat.
Using Expired Polish: Aged nail polish tends to thicken and become clumpy, making smooth application impossible. To prevent this, regularly clean out old polishes and replace them as needed.
Overloading the Brush: Applicators laden with polish can lead to drips, streaks, and uneven coats. Before application, gently wipe excess polish against the neck of the bottle. This ensures a thin, even layer.
Shaking the Bottle: Shaking introduces air bubbles into the polish, which can pop on your nails, leaving unsightly pockmarks. Instead, roll the bottle between your hands to mix the polish.
Not Sealing the Tip: Polish often chips first at the tip of the nail. To avoid this, swipe the very tip of the nail with polish, effectively "capping" it and providing extra protection against chipping.
Ignoring Dry Time: In the hustle of daily life, it's easy to assume polish is dry before it truly is. This can lead to smudges or dents. Allocate enough dry time between coats, and use a fast-drying top coat to expedite the process.
Avoiding these mistakes does more than just enhance the finish of a manicure; it prolongs the wear of the nail polish, ensuring that flawless look lasts as long as possible.
Recap: Summarizing the Steps for Flawless Nail Polish Application
The application of nail polish encompasses several critical steps, each contributing to the perfection of the final look. To ensure that nails look professionally done even when polished at home, it is crucial to follow these structured processes:
Preparation: Clean nails thoroughly to remove oils and debris. Use a gentle nail polish remover for this step, even if nails are not already painted, to ensure they are oil-free. Clip, file, and shape nails to the desired length and form. Buffing the nail surface can also help to smooth out any imperfections.
Base Coat Application: A base coat serves as the foundation for nail polish, offering a smooth surface for color application and preventing staining. Apply a thin, even layer and allow it to dry completely before proceeding to the next step.
Applying Nail Polish: Apply the nail polish in thin layers. Begin with a stripe down the center of the nail and then one on either side. Two coats are usually recommended for even, opaque coverage; allow the first to dry before adding the second.
Edge Cleanup: Any polish that has strayed onto the skin or cuticle can be cleaned up with a small brush dipped in nail polish remover. This step ensures a tidy and professional finish.
Top Coat Application: A top coat seals the colored polish, adds shine, and extends the life of the manicure. Apply it as the final layer, covering the colored polish completely.
Drying Time: Allow sufficient time for the polish to dry. While it may seem dry to the touch within minutes, it often takes longer to fully set.
Adhering to these steps will result in a flawless nail polish application with durability and a high-quality finish.


No comments:
Post a Comment